Ukraine
history
hand-tools
diy
site
information
cad
guide
3d
design
3d_printing
shortnote
series
media
animation
hardware
software
trackballs
photography
manga
art
review
learning
tool
mobile
android
gaming
programming
automation
drawing
compilation
millitary
movie
horror
vector
material
leather
digital
SUBMIT
Most people can’t imagine a morning without coffee. For some it’s a ritual, and for others it’s just a tool to wake up. There are many ways to make coffee. A coffee machine looks like the easiest one, but it’s mainly useful in an office where someone cleans and maintains it. At home you usually don’t need it. Turkish pots, geysers, and regular drip makers also seem simple, yet they involve some extra-steps that brings frustration, so you end up just putting coffee grounds in a cup and pouring hot water.
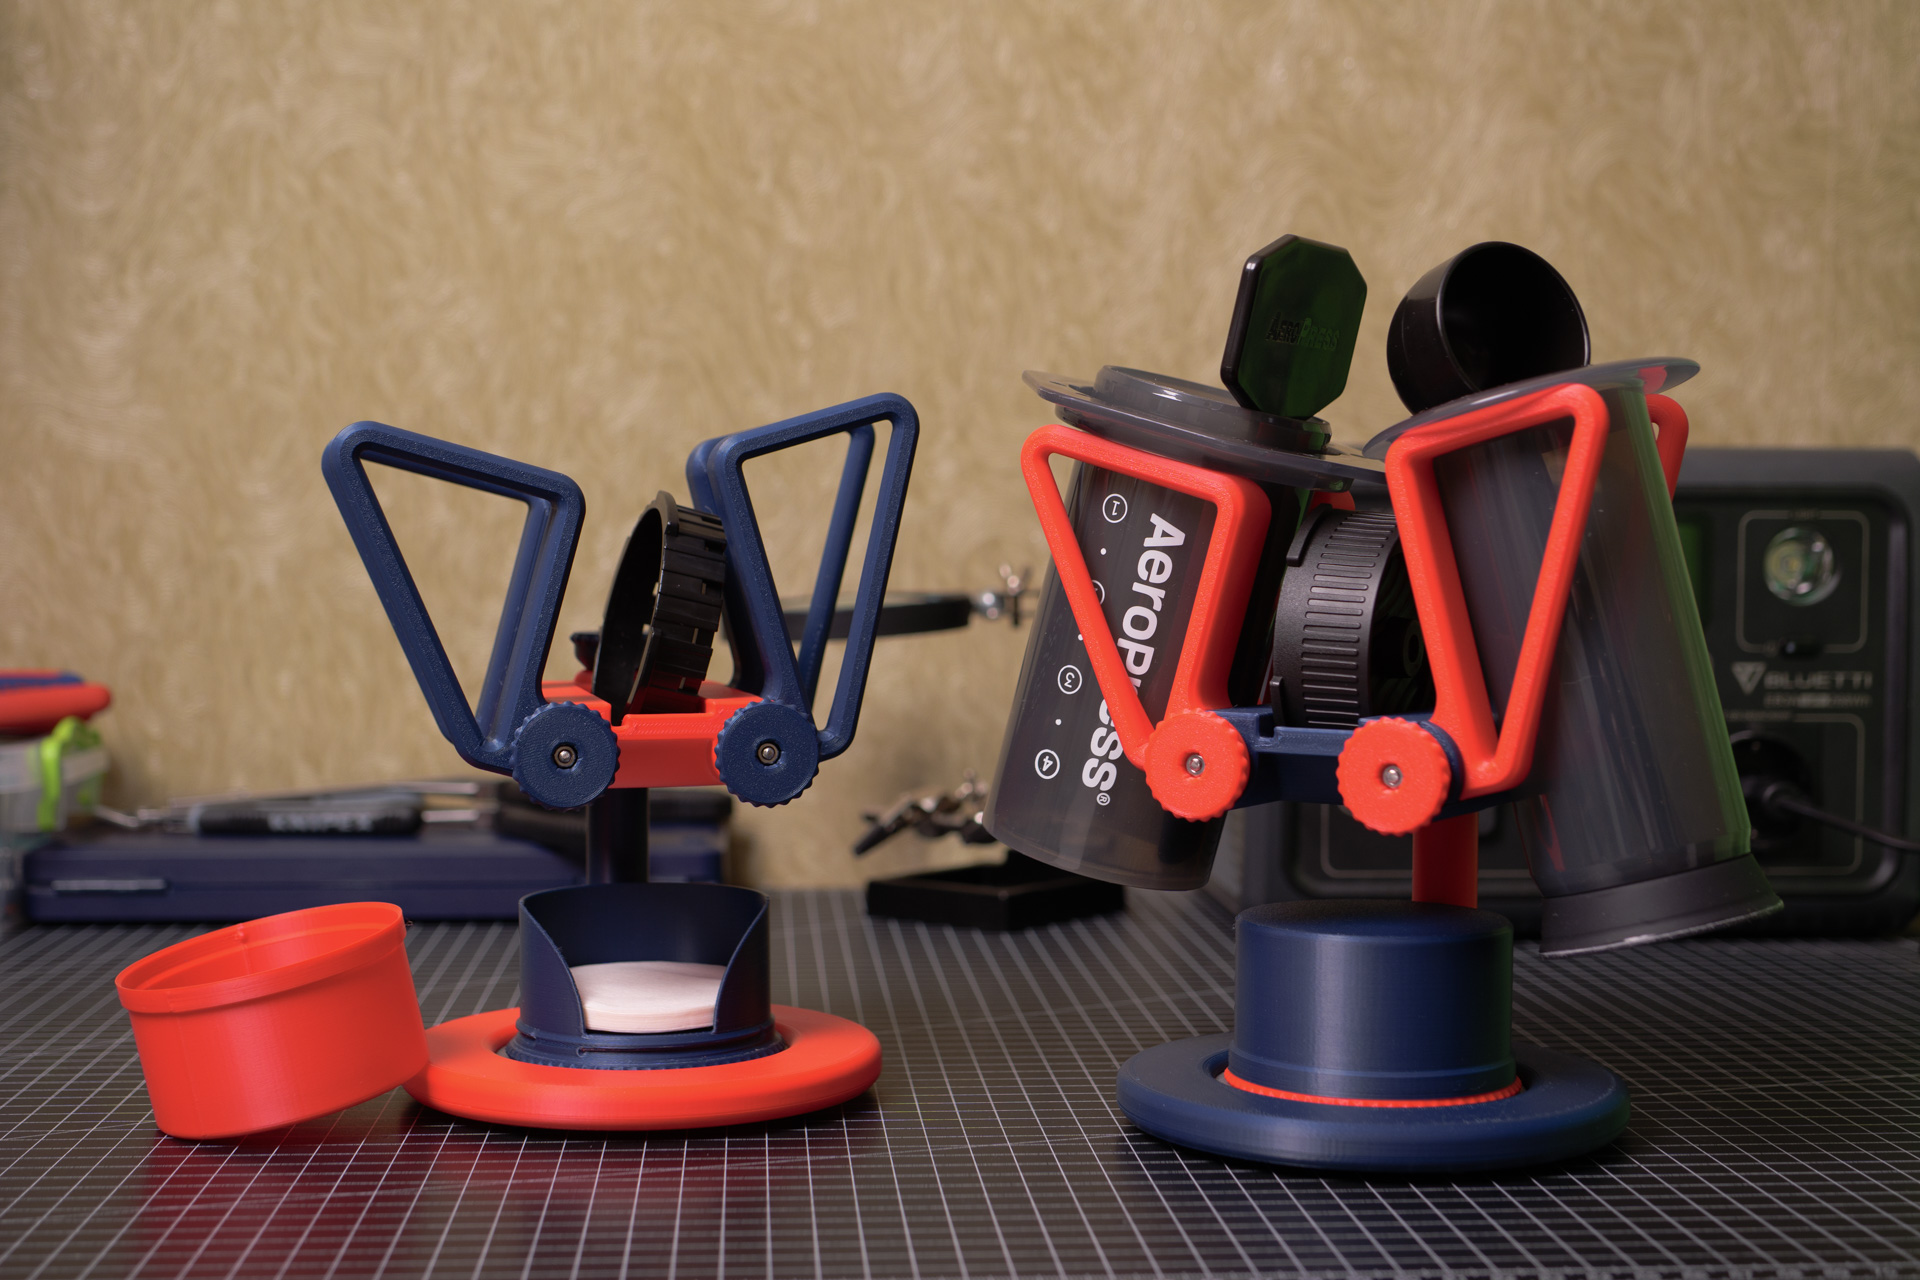
One day my wife and I tried the AeroPress. At first it seemed like gimmick, but it turned out to be one of the simplest ways to brew coffee. The coffee comes out always consistent, and you can adjust the flavor with a few variables while the human influence is minimal. In short, the AeroPress is probably the most hassle-free way to get a good cup of coffee.
I wanted to make the AeroPress routine even easier so I designed a compact stand for the AeroPress parts. I used a lot of industrial design tricks here to make it look like a self-sustained product. Open article and read more.
For a maker, having a flat work surface in the workshop is essential. But granite or cast‑iron reference plates are total overkill. Flat plywood is hard to find, and MDF, the larger the sheet, the easier it bends. So I started thinking about alternative options. Extruded aluminium works perfectly for these purposes because it offers factory‑level precision sufficient for a hobby workshop while still being relatively lightweight. In addition, it has T‑slots that can come in handy from time to time.
In this article I am modeling some fastening elements to assemble aluminium extrusion pieces into one solid countertop for the workbench.
Click on the title to read more.

Version: 2025_12_22_000001
Many LCD panels operate on the unified eDP standard. It means that we can use this open architecture and use this panels in some personal projects. For quite a while I have a bundle kit which consists of a 9.7-inch LCD panel from an old iPad model, eDP adapter for this panel, universal eDP controller board and controls.
So I finally decide to make my own design of enclosure for simple DIY display.
This artice was updated with V2.
Reed more inside.

While I was playing with the previous trackball, I began to understand what I needed from the next one. Yes, the next one. We are going serious now. So the next model is "X-keys L-trac". Originally, it was made by "CST" and it was a cult device. Now the rights have been bought by "P.I. Engineering" and they are continuing to produce them manually, piece by piece. So I decided to give it a try.
This trackball is a symmetrical, index-controlled, dynamic, 2.25" (~57mm) model.
Open article to read more about device and some mods I made for it.

Version: 2025_05_15_000003
I decided to start my trackball journey with the most safe choice on the market, and this is "Kensington SlimBlade Pro".
This trackball is symmetrical, index controlled, static, 52mm model.
Open article to read more about device and some mods I made for it.

Version: 2025_05_15_000002
During the creation of my daily setup, I decided to use a trackball as my pointer device. And now I am completely in love with this type of input device. It's comfortable, tactile, and looks cool. I decided to create a separate article exclusively for them, where I want to share my opinion about different models and my experience with usage, maintenance, and modifications.
Let me start with trackball types. After this, I am going to share some thoughts about the trackballs I had to deal with.
Open article to read more.
Version: 2025_05_15_000001
Created by TennojiM
All rights reserved
© 2026
All rights reserved
© 2026